

Organizing files can be a challenge, especially when someone else owns the document. When you own the document yourself, you can move it to whatever folder you want. When someone else owns the document, you can’t move it. If it’s in a shared folder, you can’t move it because it would be disruptive to others who need it. When you are working on a project, the files that you use the most might be stored in many different folders. Wouldn’t it be nice if you could bring them all together so when you need to access them, they would be in one place? You can - with a workspace.
What are Workspaces?
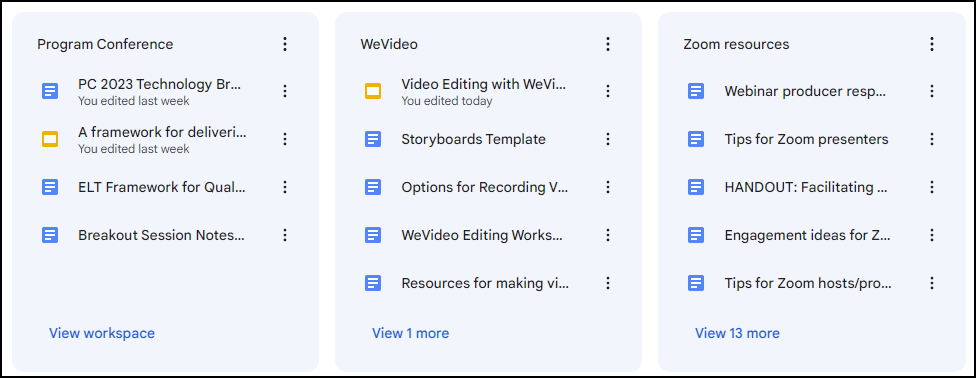
With workspaces, you can group the files that you often access together but are stored in different places (e.g. My Drive, shared drives, shared with me, computer). Shortcut links to files are created in the workspace where you can organize them as you wish, while the files themselves remain in their original location. If they are in a workspace, you will no longer need to search your entire Drive for files you frequently use.I have workspaces for resource documents that I regularly share with people. The documents themselves are stored all over the place in different folders, shared drives and some are owned by others. I can open workspaces and all of the documents are right there in the same group.
Other things to note about workspaces
- Workspaces are private to you.
- You cannot share workspaces with others
- You can create up to 8 workspaces but can hide them to make room for more
- Each workspace can include up to 25 documents
- You cannot add links to webpages, only documents
Create a workspace
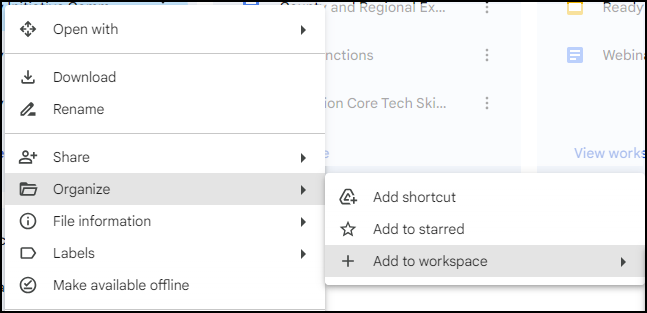
To create a workspace, just click on Workspaces in Google Drive. Click create workspace and enter a name for the workspace. Click to Add files. Select files by browsing or searching Recent, My Drive, Shared Drives, Shared with me and Starred files.Adding files from Drive: right-click on any file in your Drive to Organize and Add to Workspace
Remove a file from a workspace: click the 3 dot vertical menu to the right of the file and select Remove from workspace. It won’t delete the file, just the shortcut in the workspace.
Rename, Hide or Remove a Workspace
Click the menu in the upper right corner of the Workspace card. When you Remove workspace, the files remain in their original location. Only the workspace is deleted.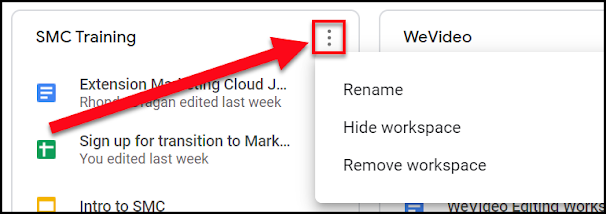
Who knew? Thanks for this tidbit Karen. Well done.
ReplyDeleteAwesome information that I have been wondering about. Nicely put together and concise. Thank you!
ReplyDeleteOthers have mentioned using Workspaces but I haven't jumped in. Now with this, I think I can!
ReplyDeleteSuper helpful. Thank you
ReplyDeleteI think this "tip" is going to be very useful to me! Thanks for keeping us up-to-date on how to streamline our work.
ReplyDelete