If you have ever used PowerPoint or Google Slides to create a slideshow of photos, you know how much work it can be to import, crop and resize all the photos, set up transitions and loop the presentation. This article explains two simple ways to create a slideshow using either the Windows Photos app or Windows File Explorer
Use the Windows Photo App
- Put all the photos for your slideshow into one folder
- From the Windows Start menu, open the Photos app
- Click the Folders tab in the Photos App and select Add a folder

A Windows File Explorer window will open. Select your folder and click Add this folder to Pictures

The folder will now show in your Photos App. Open the folder, click the three dots . . . more menu in the upper right corner and select Slideshow
.
The slideshow will cycle through all the images in the folder and loop automatically. The slideshow will not show pictures stored in subfolders.
Use the Slideshow feature in Windows 10 File Explorer
You can view a slideshow of photos that are located in any folder, on a USB stick or an external drive.- Open File Explorer in Windows
- Open the folder where your photos are located
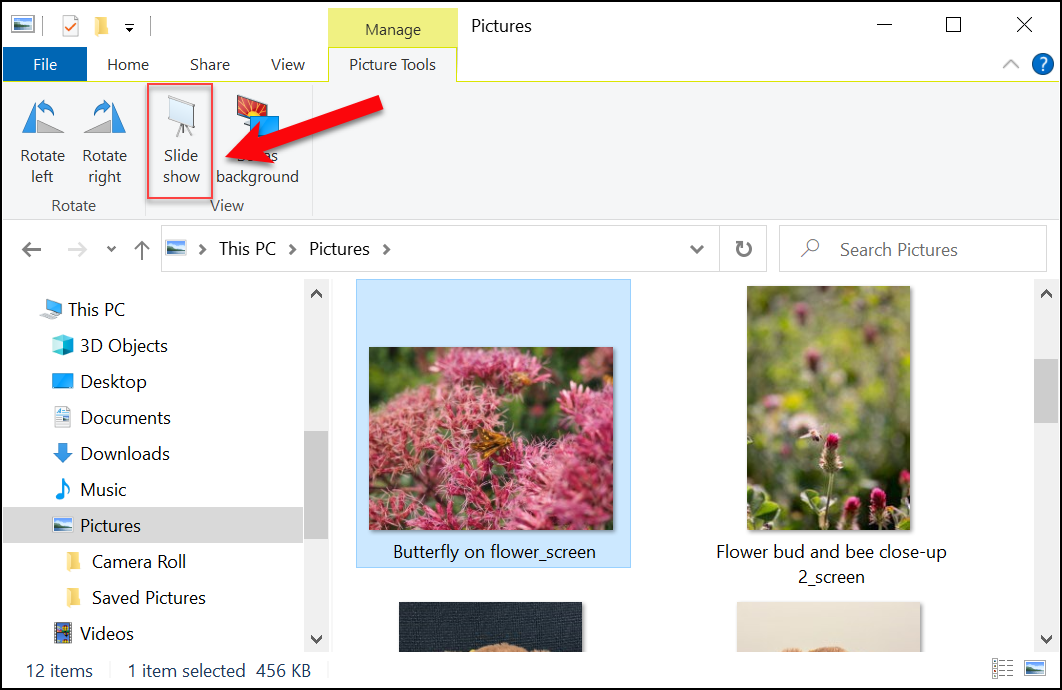
- Single-click on any image to select it. The Manage tab appears at the top of the window.
- Click Slide show

This will show all the photos in the folder and photos in any subfolders. If you only want to show specific photos in a folder, choose one of the options below:
- Select photos by holding down CTRL while selecting each image you want in the slideshow.
- Select a string of photos by holding down the SHIFT key while selecting the first and last image in the folder.
Slideshow Controls
To control the speed, shuffle the order, loop or pause your slideshow, right-click on any image while your slideshow is playing to open the following menu:I hope one of these options works for you the next time you need a slideshow!


Very helpful, Karen! Follow up question - is there a way to remove the folder from the Photos folder after I've used it? Am thinking I could end up with a lot of stuff in there...
ReplyDeleteYou can remove the folder in the Photos App by clicking the three dots menu and selecting Settings. In Settings under Sources, you will see your list of folders. If you click the x next to the folder it will remove the folder but it will NOT delete the image files from your computer.
DeleteGood stuff Karen. Sounds pretty easy.
DeleteWindows 11 Photos App dropped the "shuffle" option but most of the other functionality is still there.
ReplyDelete