

Zoom’s recording highlights feature gives you the key takeaways of the meeting and allows your viewers to watch the highlights, or they can choose to watch the entire recording. With the recording highlights feature enabled, Zoom will automatically select the most important parts of the recording and allow you to adjust the highlights before sharing.
Cloud recordings automatically delete after 180 days
Enable recording highlights in your account
Before you can use this feature, you have to enable it in your Zoom settings.- Log into the Zoom portal at zoom.umn.edu
- Click Settings
- Click the AI Companion tab
- Under Recording, select the Smart Recording with AI Companion toggle to enable it
- (Optional) Select or clear any of the following check boxes:
- Create recording highlights: Zoom will automatically highlight the most important parts of the recording. Hosts can adjust the highlights as needed and share the video summary.
- Create smart chapters: Zoom will automatically group sections of the recording into chapters with an overview. Hosts can edit the chapters manually.
- Create next steps: Zoom will automatically summarize any actions to take after the recorded session. Hosts can edit the next steps manually.
- Meeting coaching: Zoom will provide additional analytics on key meeting and conversation factors, including talk speed, talk-listen ratio, longest spiel (or monologue), filler word usage, and patience.
- Click Save

Create recording highlights
After you’ve enabled the recording highlights in your settings, Zoom will automatically generate them for cloud recordings only.- Record a Zoom meeting or webinar to the cloud
- When the cloud recording and audio transcript has processed, you can view/edit recording highlights in the Zoom portal
How to manage recording highlights
Review highlights
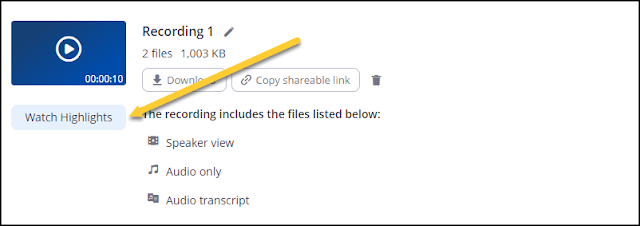
- Log into the Zoom portal at zoom.umn.edu
- Click Recordings
- Click the name of the recorded meeting
- Click Watch Highlights or the Play button. The recording will open and the transcript text appears to the right of the video with the highlights already added.
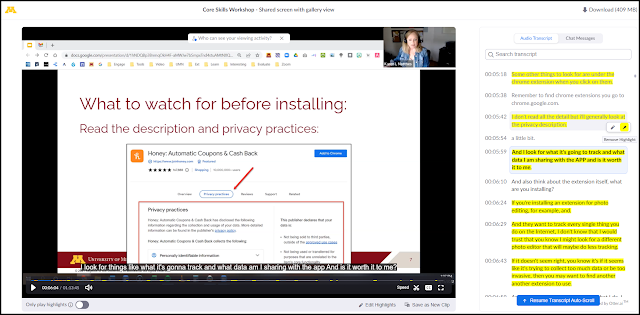
Switch between viewing the full recording and the highlights by using the slider below the playback bar.

Adjust highlights
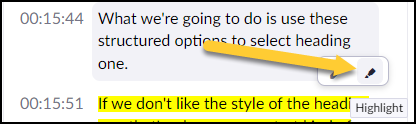
- To highlight everything for a particular speaker, hover over the speaker’s name in the transcript and click the highlight icon.

- To highlight a specific paragraph, hover over the text and click the highlight icon. Click again to remove the highlighting
.
- To edit highlights directly in the playback bar, click Edit Highlights below the playback bar. Drag your cursor in the playback bar to add, remove or extend highlights. Click Done when finished editing.

Save and share recording highlights
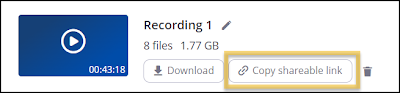
You can also save highlights to a new video clip. If you do this, viewers can only watch the recording highlights and not the full recording.
How viewers see the recording highlights
If the host shared the full recording with highlights, viewers can choose to watch the full recording or only play the highlights. To watch only the highlights, click the toggle next to Only play highlights below the recording playback bar.
Comments
Post a Comment