

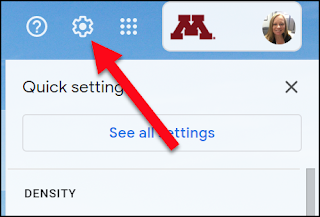
What you will find on the Quick Settings menu
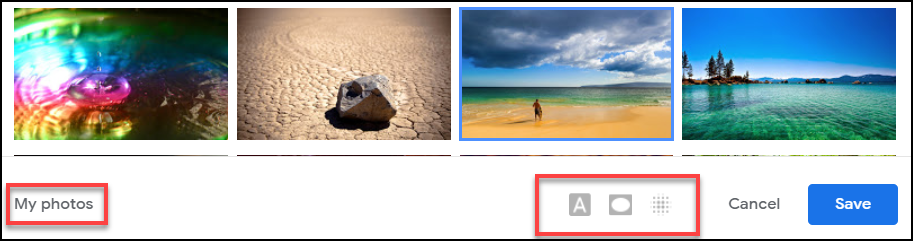
Density: your preference for spacing between labels, between the individual messages in your inbox, and around the inbox sections according to YOUR liking and the size of the computer monitor. Choose from default, comfortable or compact.Themes: choose from several themes to make looking at your inbox a little more pleasant. When selecting a theme, check out the options at the bottom to make adjustments to the text from light to dark, add a vignette, or blur the background. You can also upload your own photo to use as a background.
Inbox type: choose from five different inbox configurations. If you’ve ever missed an important email because it landed under a different tab in your default inbox, you can customize your settings or choose a different inbox type.
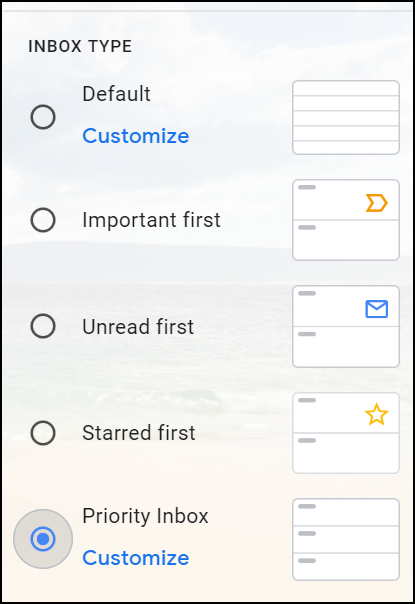
Important first: this option splits your inbox in half, with messages Google deems to be important on top. Gmail uses several signals to decide which messages to automatically mark as important, including:
- Whom you email, and how often you email them
- Which emails you open
- Which emails you reply to
- Keywords that are in emails you usually read
- Which emails you star, archive, or delete
Starred first: starred messages appear at the top and everything else is below.
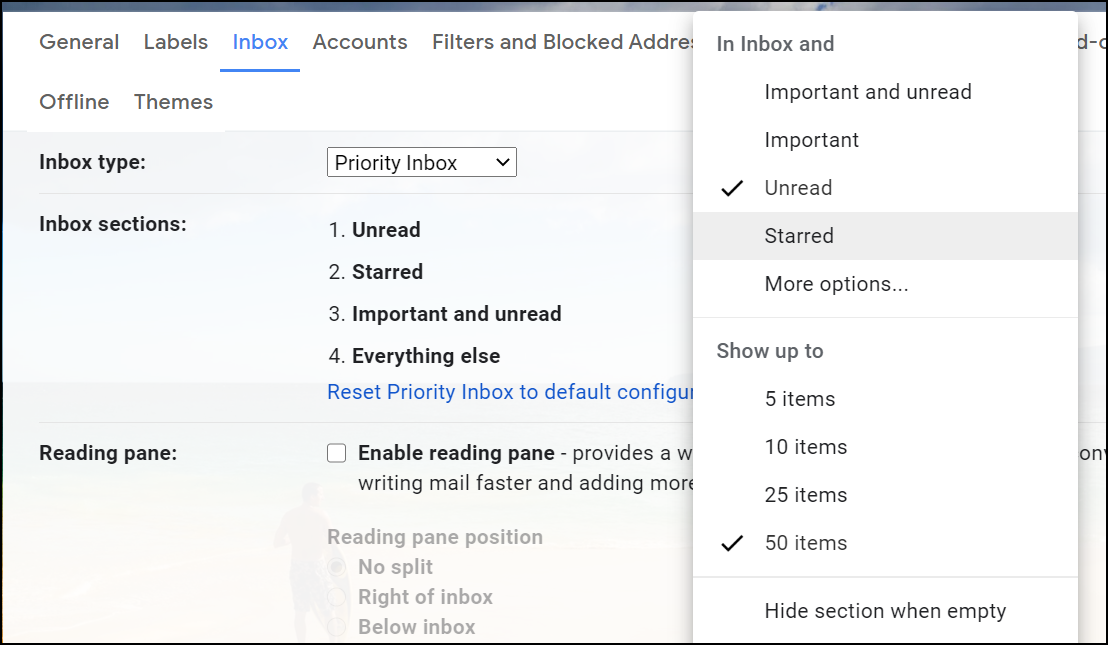
Priority inbox: my personal favorite because you can customize your inbox exactly the way you want it. Create up to four customizable sections to break up your inbox email. You can also select how many messages you want to see in your inbox.
Multiple inboxes: helpful for people who have multiple email accounts and want to consolidate them. They’re also good for people who want to prioritize certain daily tasks or individuals. For example, you can:
- Create inboxes for tasks that need to be done today, tomorrow, and next week.
- Create inboxes for email from certain people, such as your manager
- Manage email from different accounts. You can create up to 5 different inboxes.
Reading pane: choose from a vertical or horizontal split to preview your messages. After you've enabled either split-screen mode, if you put the mouse cursor directly onto the line that separates the preview pane and list of emails, you can move that line left and right or up and down. This lets you adjust how much of the screen you want to use for reading the email and how much should be reserved for viewing the email folder.
Thank you so much!
ReplyDeleteGreat overview -- thanks!
ReplyDelete